Configuration
Ullr functions just like a really long serial cable, to connect software and serial devices over long distances. Ullr needs to be installed and configured on both sides of the connection: on the computer running the target software, and on the computer connected to the serial device. Ullr can run on a laptop, a Raspberry Pi, or any device capable of running Python applications. See Installation for installation info.
The following is a guide for interactive configuration using the web interface. However, configuration can be done by simply editing the config file.
Navigating to the WebUI
Ullr hosts a web interface on port 5000 of the local machine by default. You
can get there by typing localhost:5000 in a browser window. If you used
a Windows installer, there will also be a shortcut in the start menu.
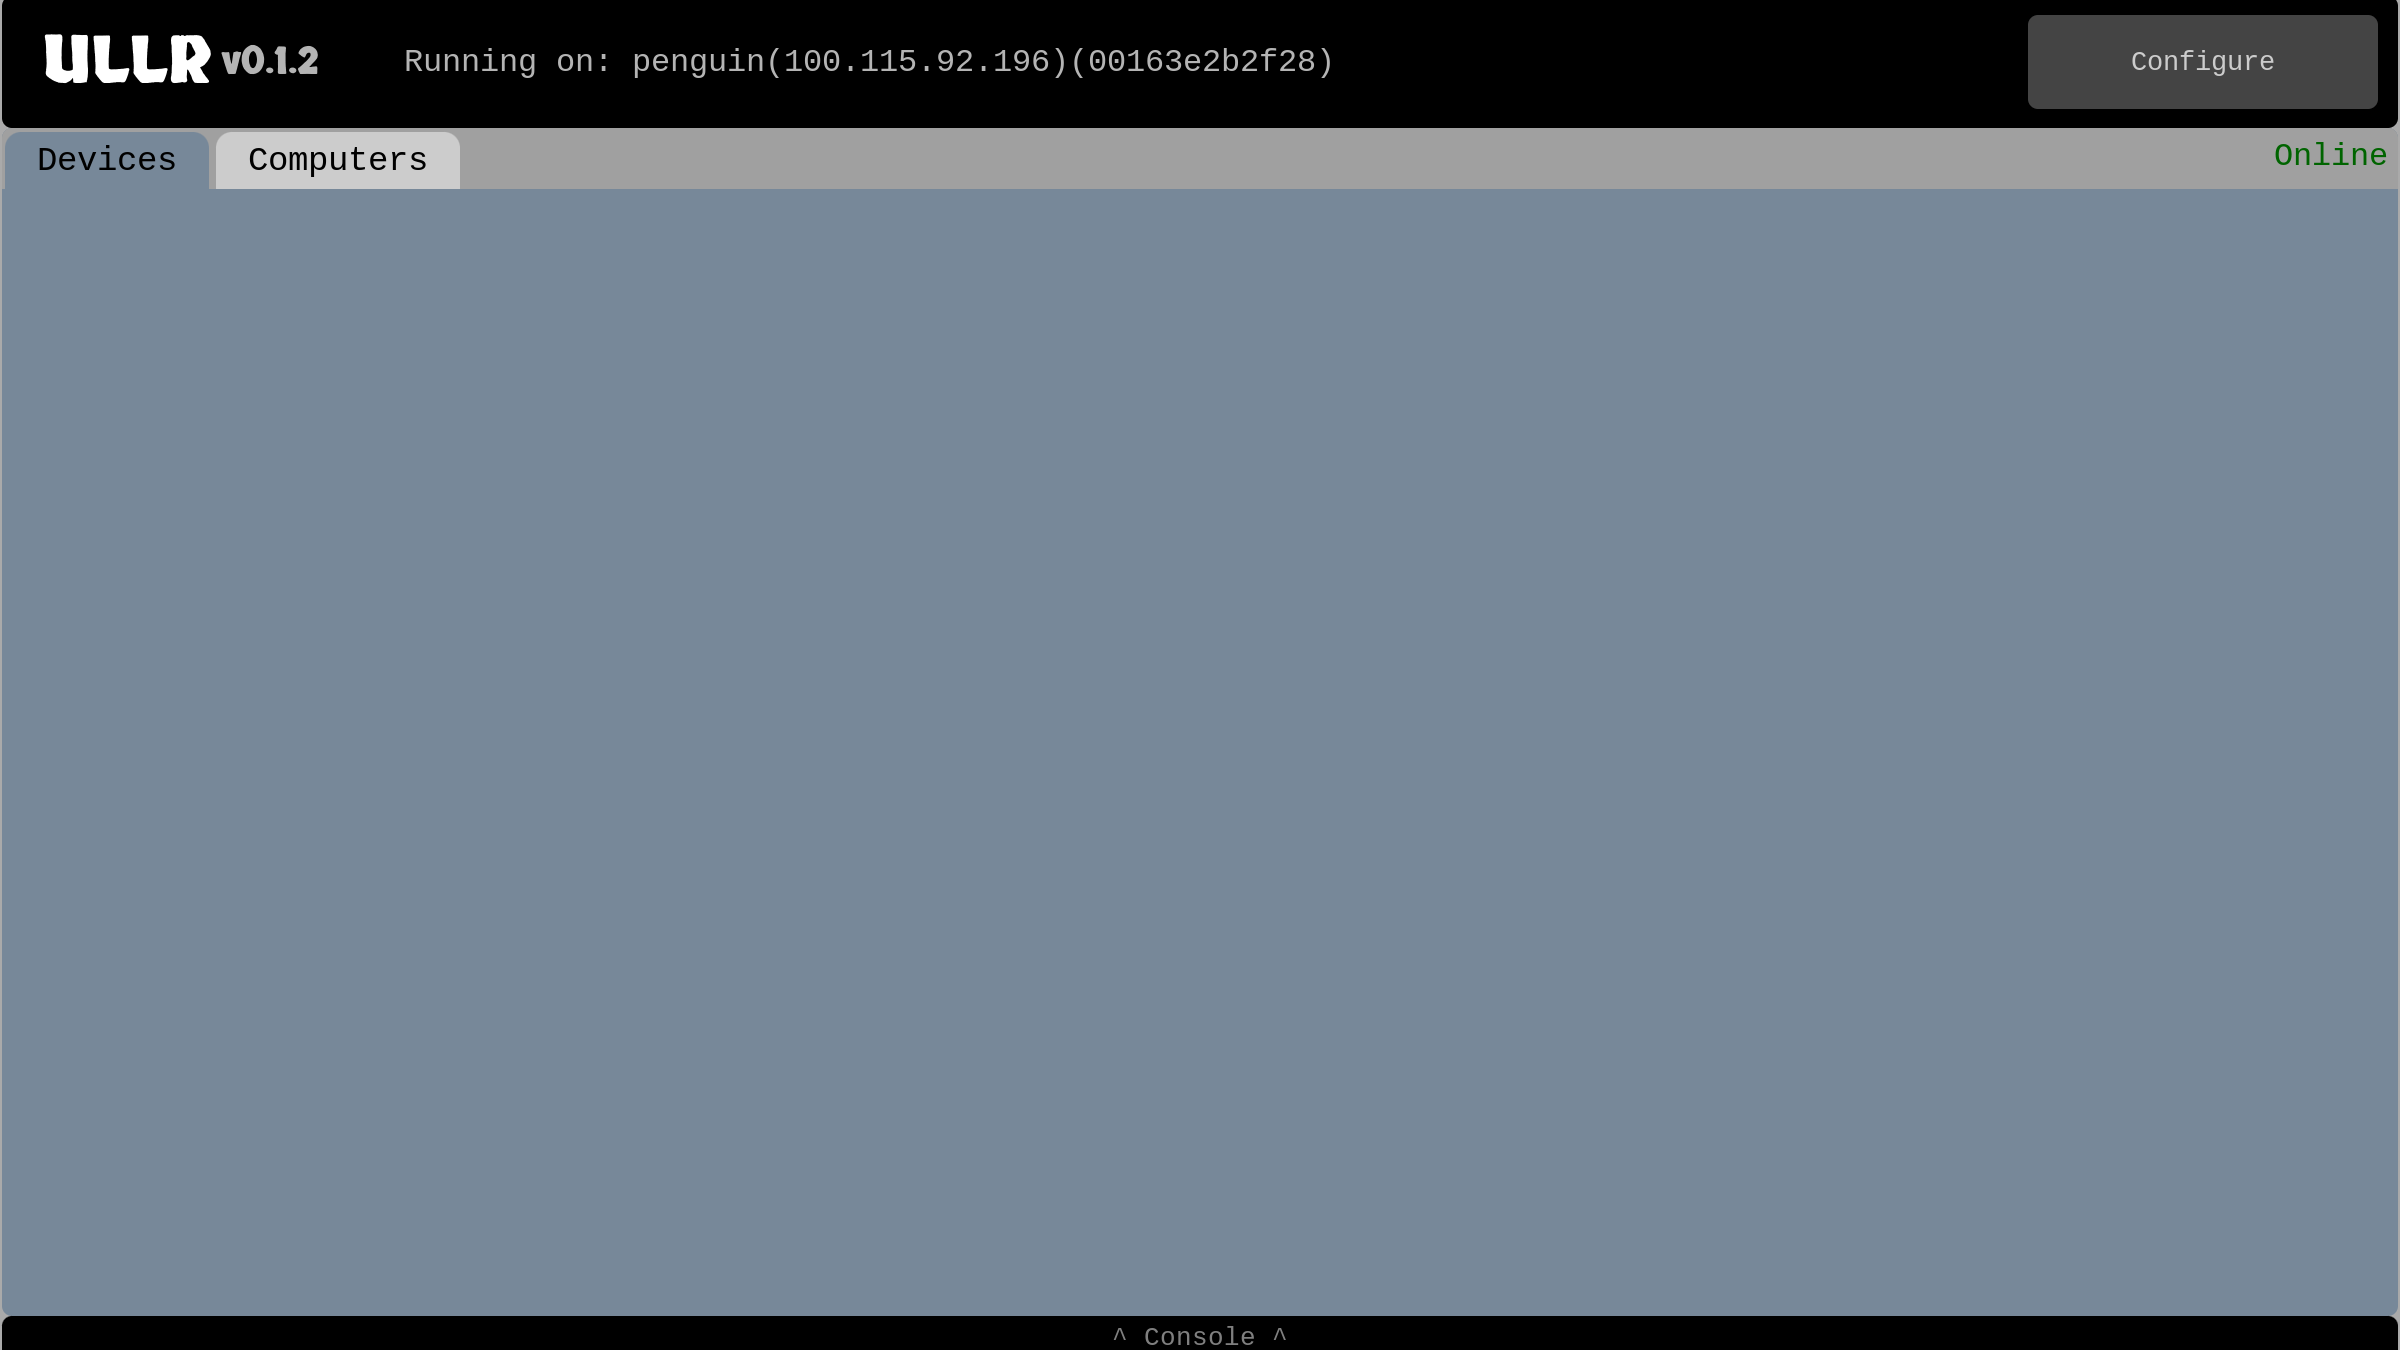
The Ullr web interface.
To get started, we need to setup Ullr for our needs. The configuration settings can be accessed by clicking the “Configure” button on the top right of the screen.
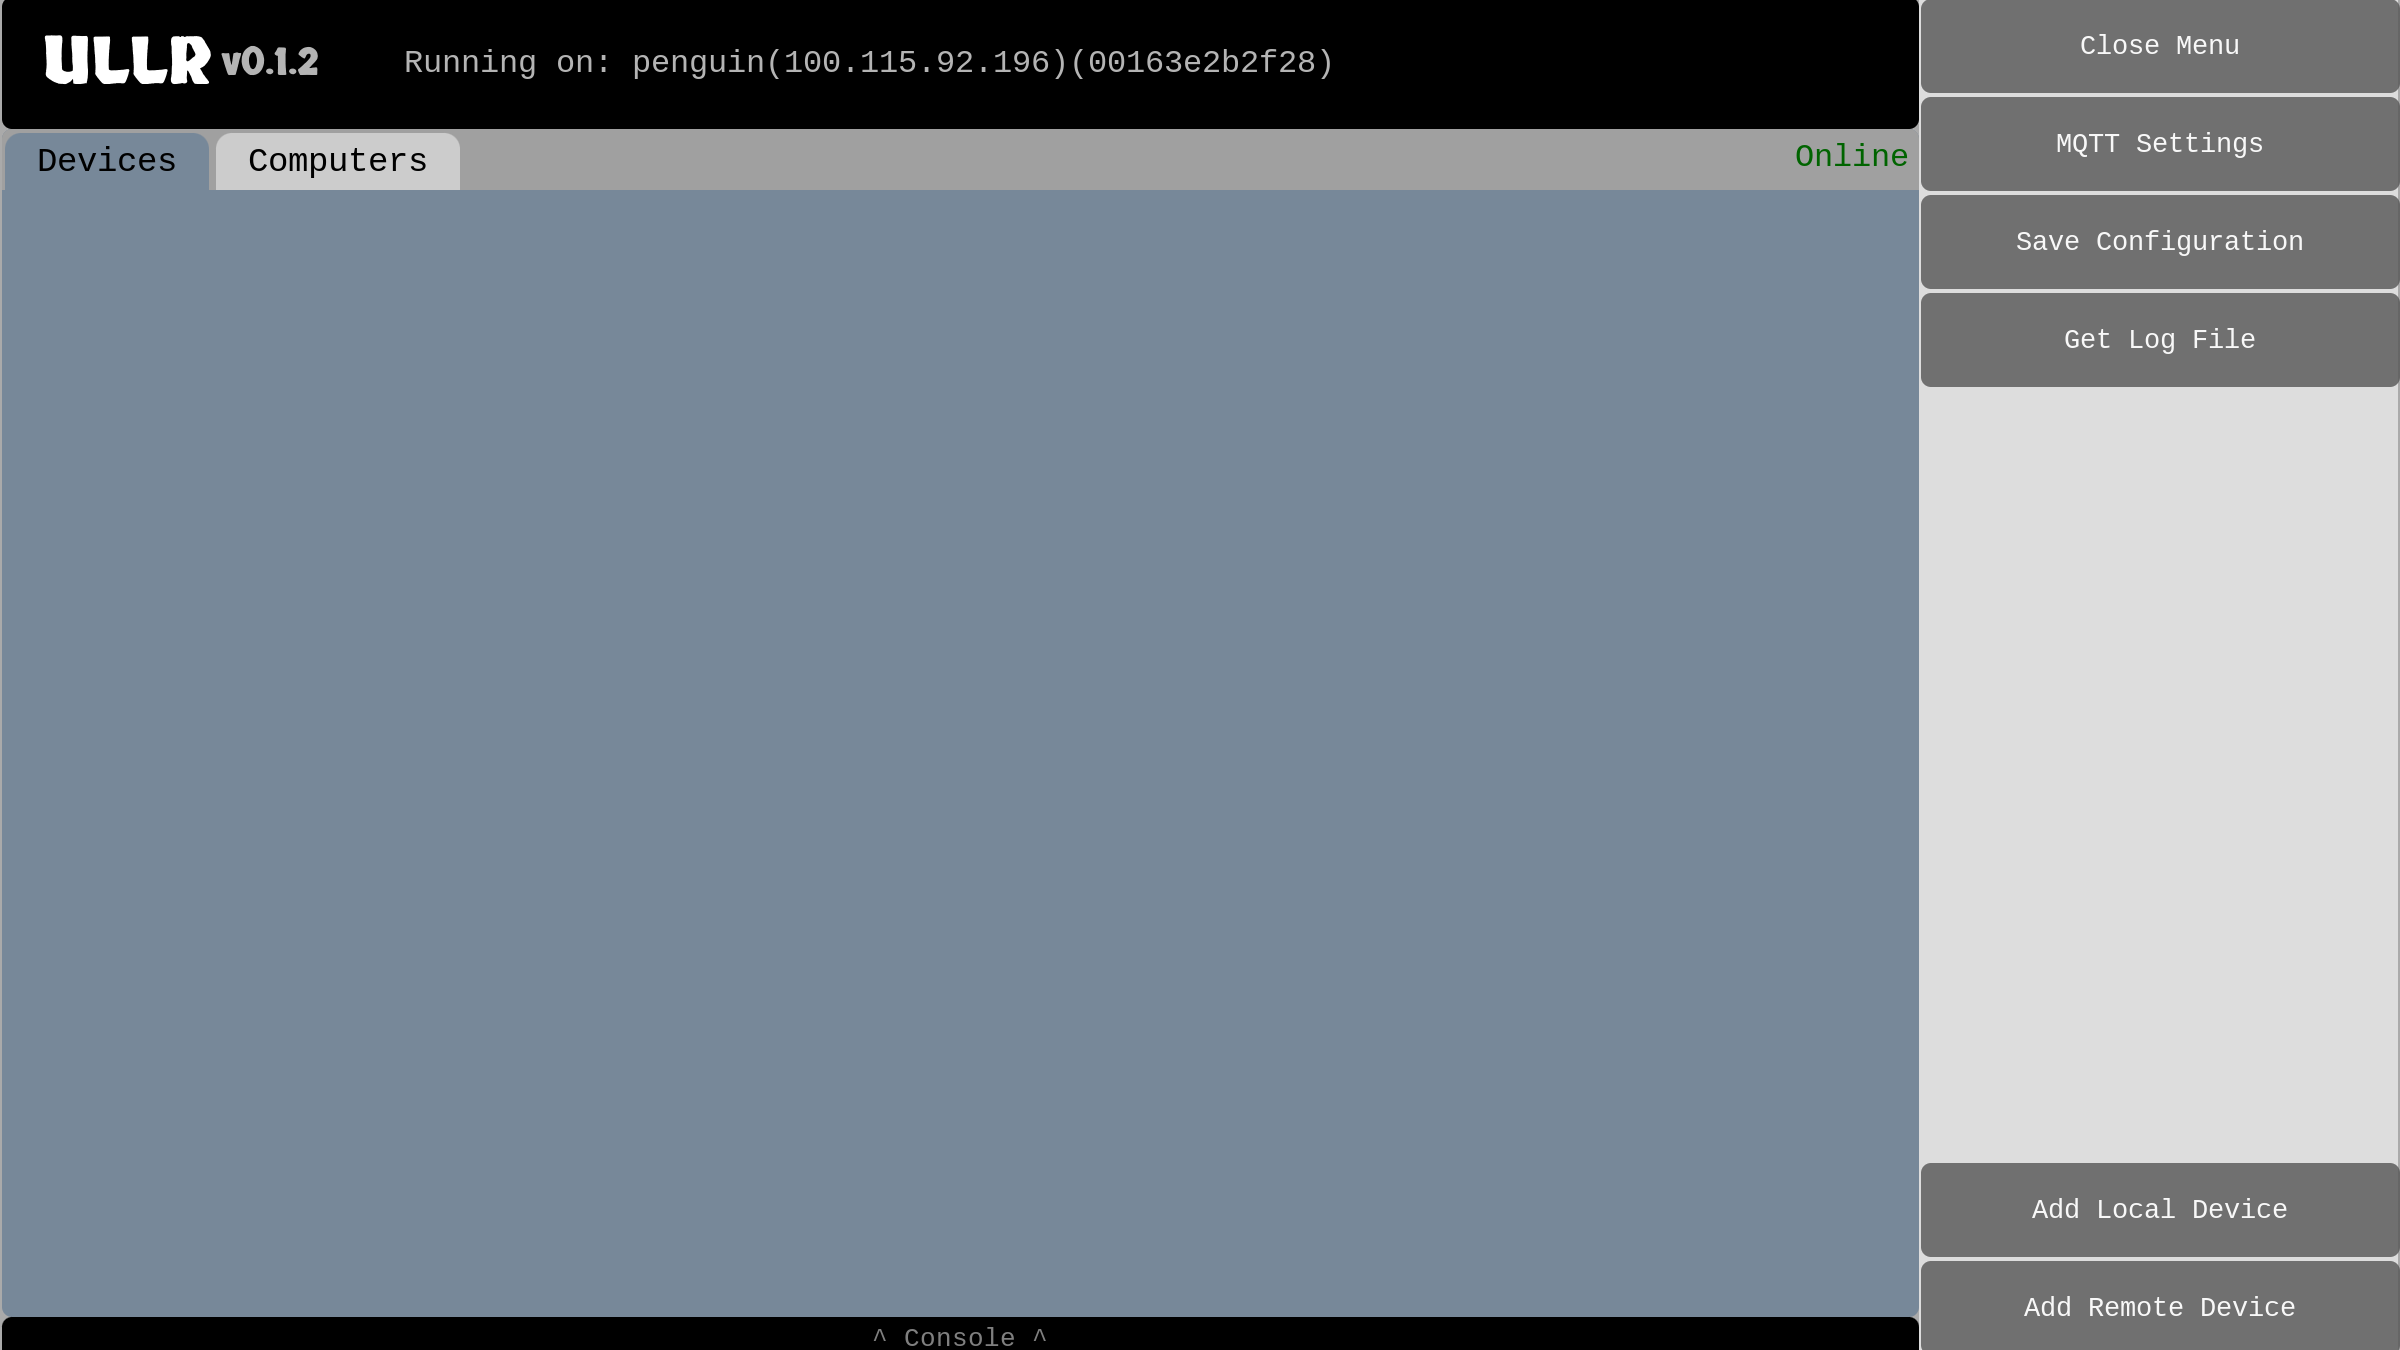
WebUI with configuration menu open.
MQTT Broker Settings
The first step is to configure the MQTT broker. By default, these settings are set to the free shared Ullr broker.

The MQTT settings dialog.
However, Ullr can be configured to use any MQTT broker. Some free options are available at Hive MQ. For more information on how MQTT works, see MQTT Messaging Protocol.
Adding Local Devices
A local device is a device that is plugged into the local machine with a serial cable, or a piece of software running on the local machine. Click on the “Add Local” button to open the add device dialog.
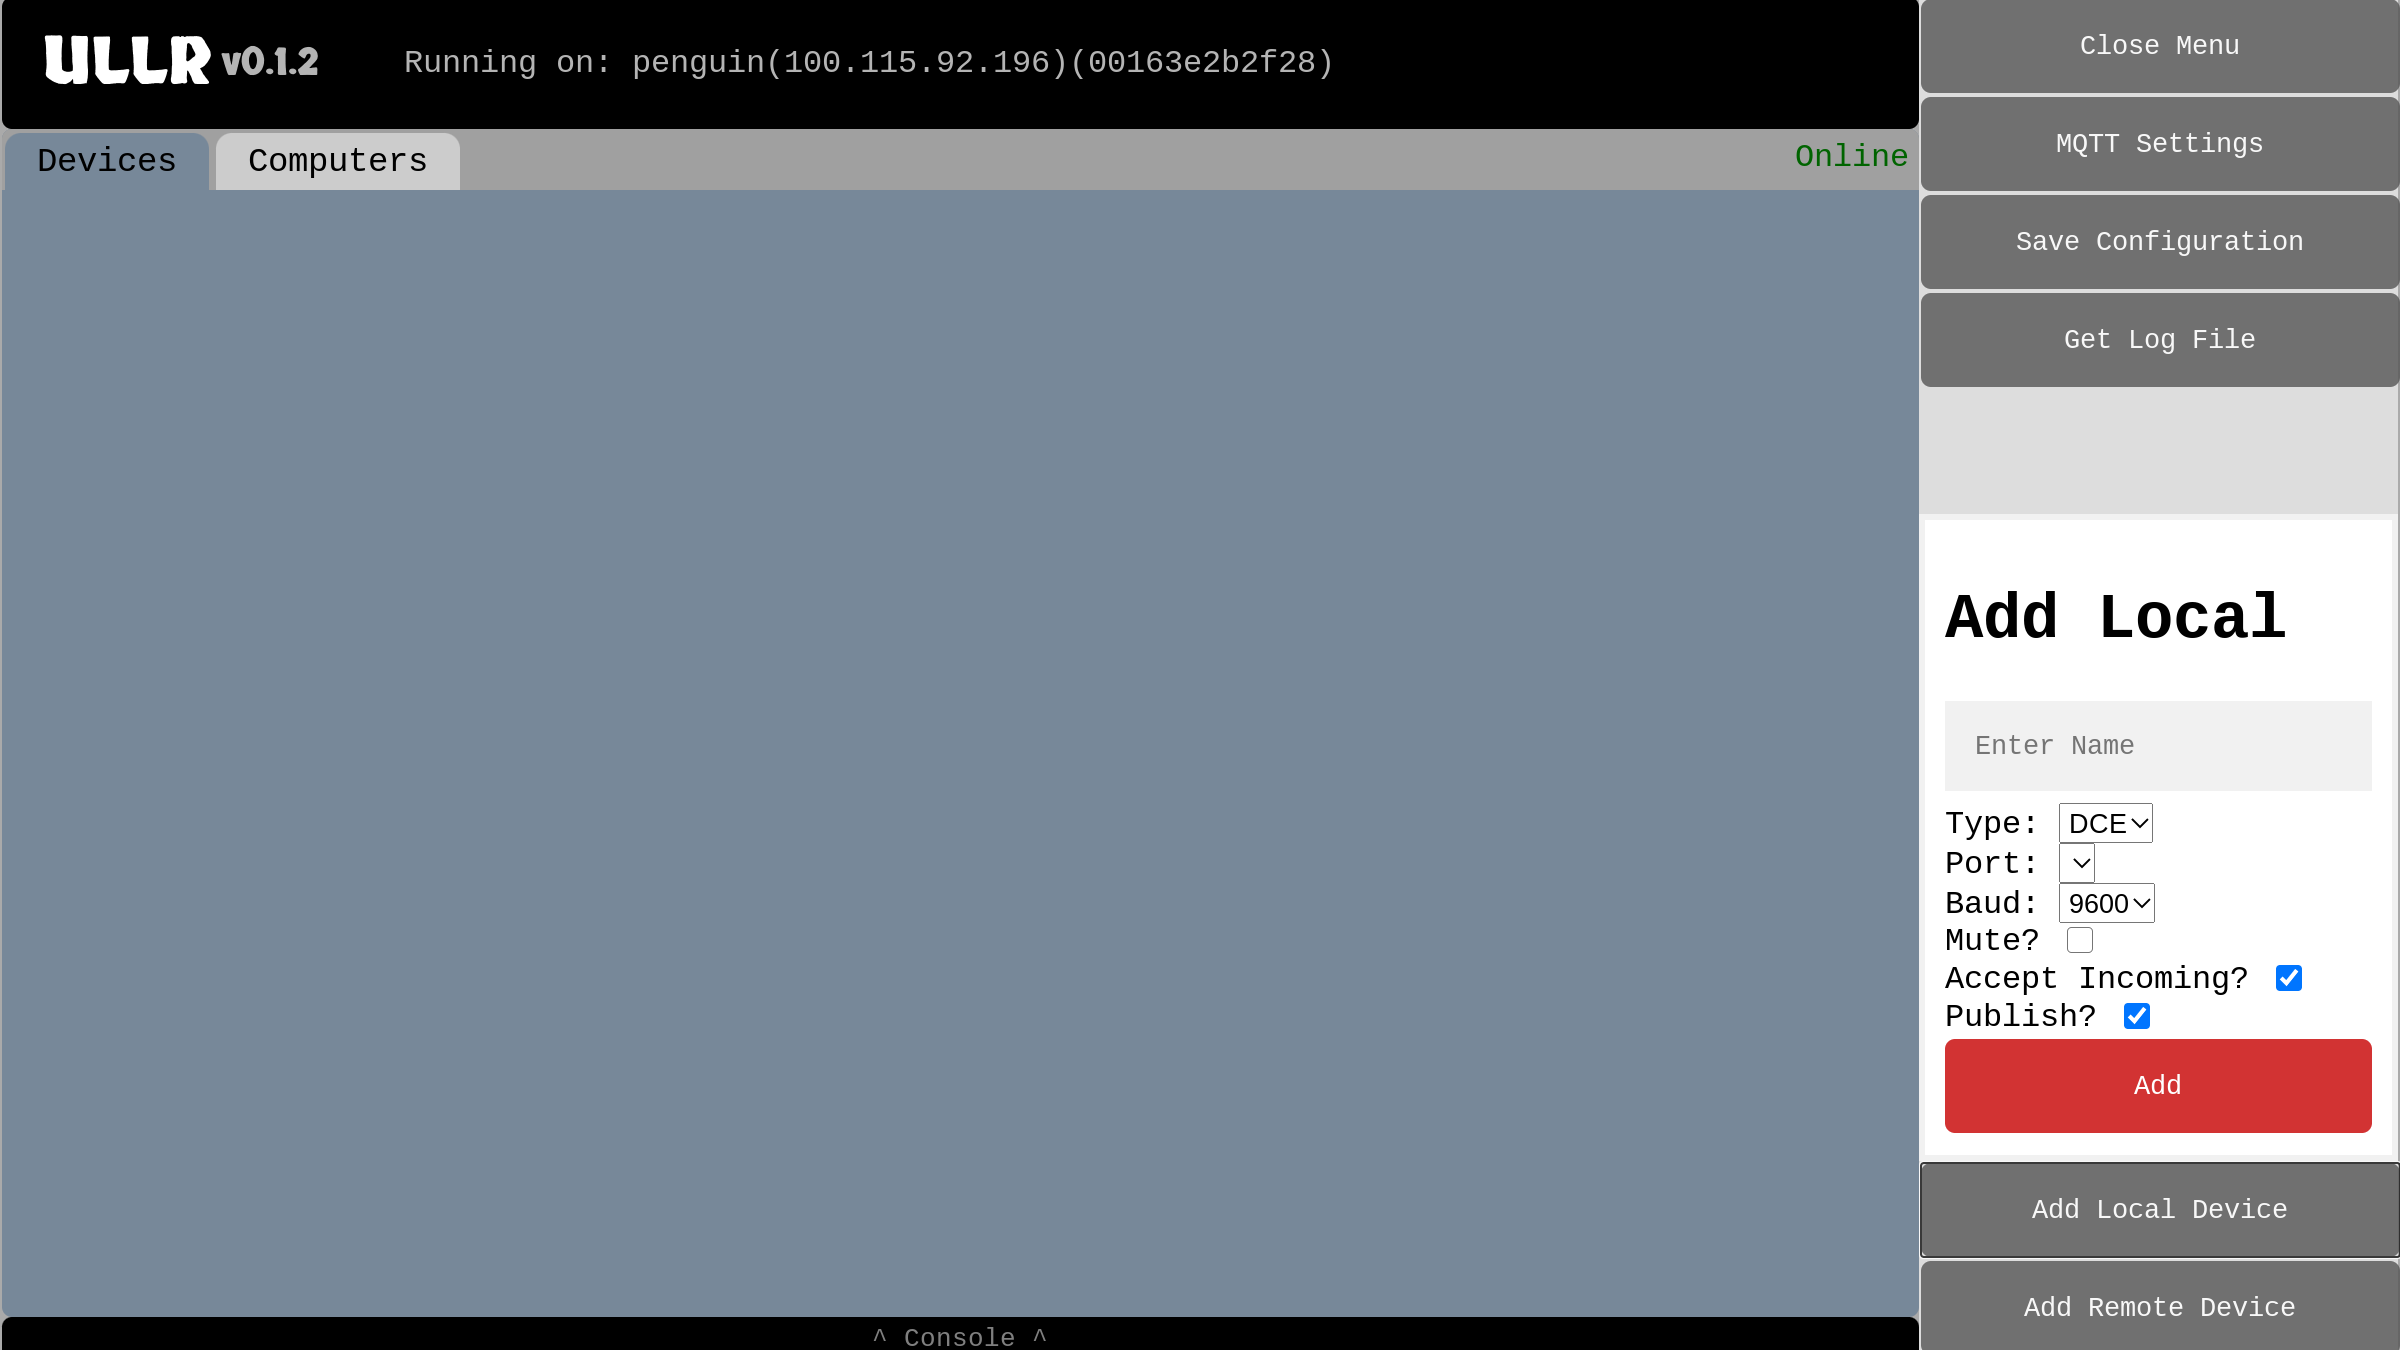
The local device dialog.
Give the device a descriptive name. It can be anything that makes sense to you, like “CP540”, “Start Timer”, or “Split Second Software”. Next, we need to tell Ullr whether this is a DCE or DTE device. Generally, if it’s a physical device that’s plugged into the computer is a DCE. If it’s a piece of software it’s a DTE.
The next step is to select the serial port and baudrate. This is the port the physical device is plugged into, or the port the software is listening on. Ullr automatically lists all available serial ports. If you don’t see the port you’re expecting, try refreshing the page or reconnecting your device.
Finally, we have some choices to make reflected by the three checkboxes at the bottom. We can choose to Mute the device if we only want to send the device messages and don’t want or expect to receive messages from it. Checking this box will reduce CPU usage for devices that don’t send messages. By default this box is unchecked.
Along these same lines, we can choose whether or not the device accepts incoming messages. If we only expect the device to send messages, not receive them, this box can be unchecked. This will also reduce CPU usage. By default the box is checked.
Finally, we can choose whether or not the device is published. If a device is published, any message it sends will also be sent to the MQTT broker (the “cloud”), where it can be read remotely.
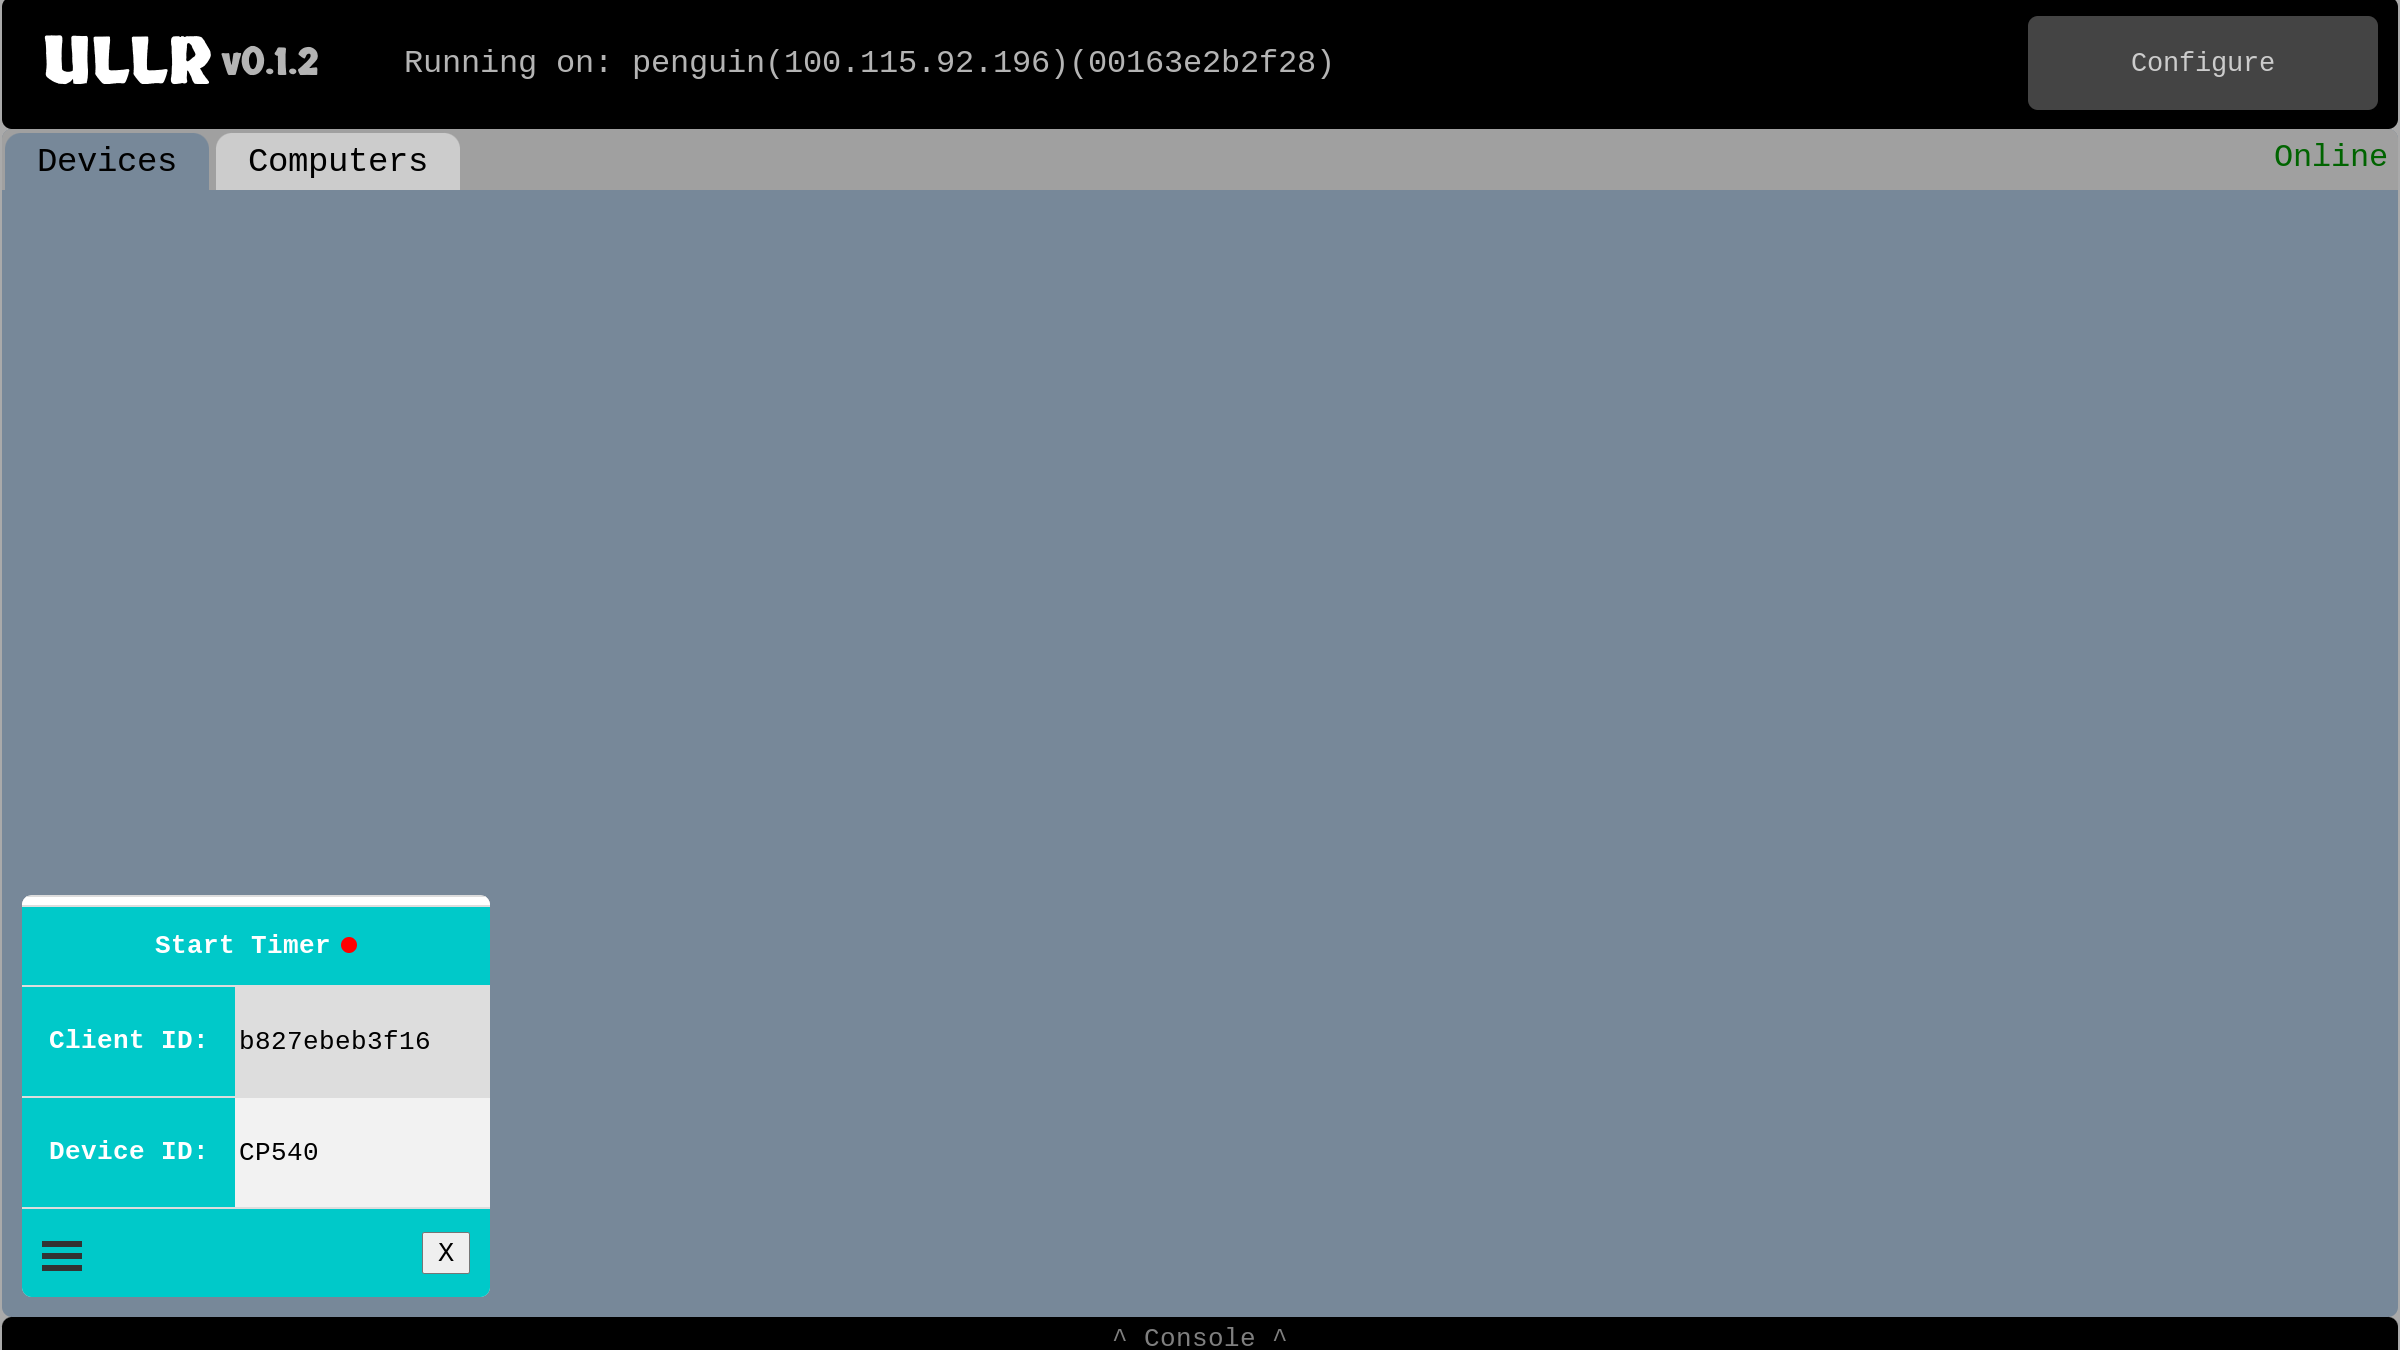
Click the red “Add” button to add the device. It will then appear in the device window under the appropriate tab: “Devices” if DCE, and “Computers” if DTE.

Local device added.
Clicking the hamburger icon in the lower left will bring up some advanced options for the device, which will be covered elsewhere in this document. At the top of the window is the “Published Name”. This is what is necessary to connect to the device remotely. Clicking on the “X” in the lower right of the device will remove it. If you run into trouble, check the console for more information.
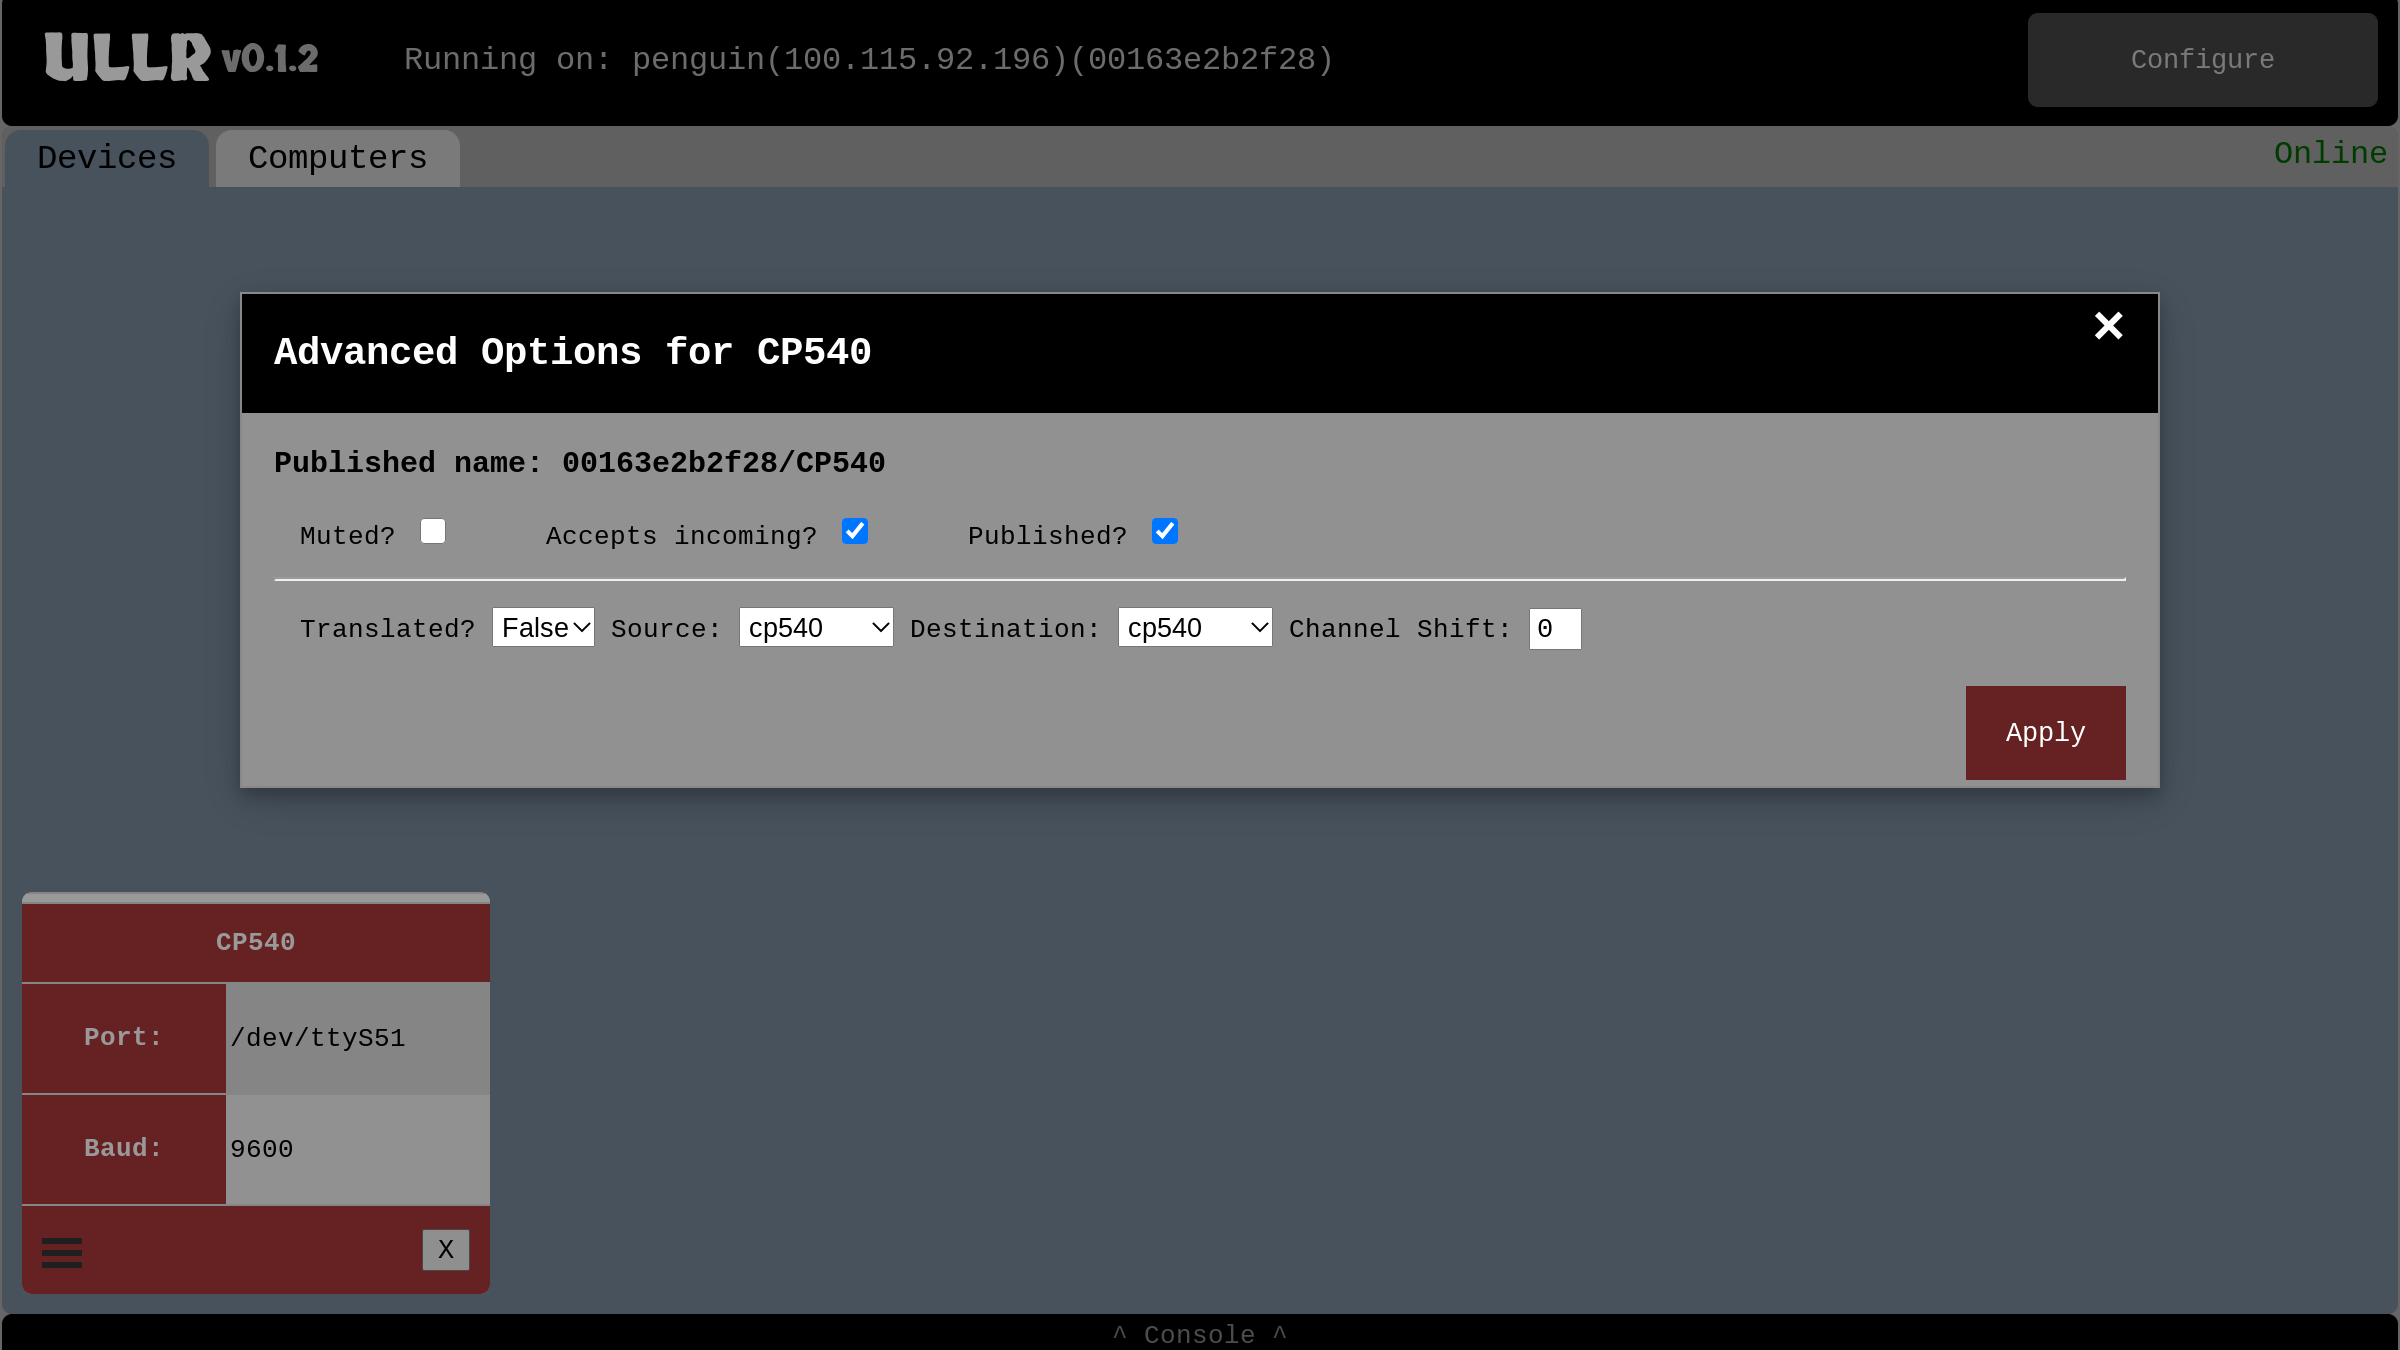
Local device advanced settings.
Adding Remote Devices
A remote device is something that’s plugged into a remote computer. We’ll use Ullr and the MQTT Messaging Protocol to access it. Click on the “Add Remote Device” button in the “Configure” menu to bring up the dialog.

The remote device dialog.
Give the device a descriptive name. It could be “Split Timer”, “Remote Sensor”, “Display Board”, or anything else that makes sense. The next field is labeled “Host ID/Device ID”, and is the specific MQTT topic we are subscribing to. The Host ID will be the unique MAC address of the remote host with colons removed, and the Device ID will be the name of the remote device with spaces replace by underscores. For example, maybe we want to connect to a device called “CP 540” on a remote Raspberry Pi. If the Raspberry Pi’s MAC address is “00:16:3e:2b:2f:28”, we need to enter “00163e2b2f28/CP_540” in the “Host ID/Device ID” field. If we are unsure of the device name, we can just enter “00163e2b2f28” to subscribe to ALL devices from the remote host.
Next is a field to determine how late messages are handled. When set to 0, Ullr will accept all messages regardless of how long they spend in transit. Otherwise, Ullr will only accept messages that arrive quicker than the value set in this field. Messages that arrive after the On-time Arrival window can then be dealt with manually. This is described in detail in the Handling Late Messages section.
The bottom 3 fields are identical to those described above in the Adding Local Devices section.
Click the blue “Add” button to add the device. It will then appear in the device window under the appropriate tab: “Devices” if DCE, and “Computers” if DTE.
Remote device added.
Clicking the hamburger icon in the lower left will bring up some advanced options for the device, which will be covered elsewhere in this document. Clicking the “X” in the bottom right will remove the device. If you run into trouble, check the console for more information.
Saving configuration
Once the configuration is complete, you should save the settings to save time the next time Ullr is run. Click the “Save Configuration” button in the “Configure” menu. The configuration will be saved to your home folder. On Windows machines this might be C:Usersjdoe.configullrconfig.ini. On linux machines it might be /home/jdoe/.config/ullr/config.ini, or /etc/ullr/config.ini if run as Superuser.